
TunnelBear Befriends Penguins with Limited Linux Support

(Instructions last updated: March 5th, 2020)
TunnelBears and Penguins have been friends for some time now, but occasionally that friendship needs an update. And so, we’re excited to announce that you can now connect to TunnelBear on the latest version of Ubuntu. We currently have apps for Windows, macOS, iOS and Android along with a Browser extension. While we aren’t quite ready to build a full application for Linux, we are now offering settings and instructions for manual configuration of a connection to the TunnelBear network.
Follow these steps to setup TunnelBear on Ubuntu's standard desktop LTS (long term support) release (currently 18.04.x aka Bionic)
Unlike the more common TunnelBear experience, “some assembly is required”. Following the steps below should get you tunneling, but it’s possible that you’ll need to use some Linux-style ingenuity to get things working with different distributions or custom setups. As such, the Linux instructions and settings are not currently supported by the TunnelBear support team.
With all those disclaimers out of the way, here’s how to get a TunnelBear setup on your Linux rig:
- Open a Terminal window and enter the following command (you may find some of these packages already installed by default on Fedora):
sudo apt-get install network-manager-openvpn-gnome
-
Download the latest TunnelBear OpenVPN configuration files from here
-
Unzip the folder to your machine in a location of your choosing. Do not delete these files after setup, you’ll need to keep them in place!
-
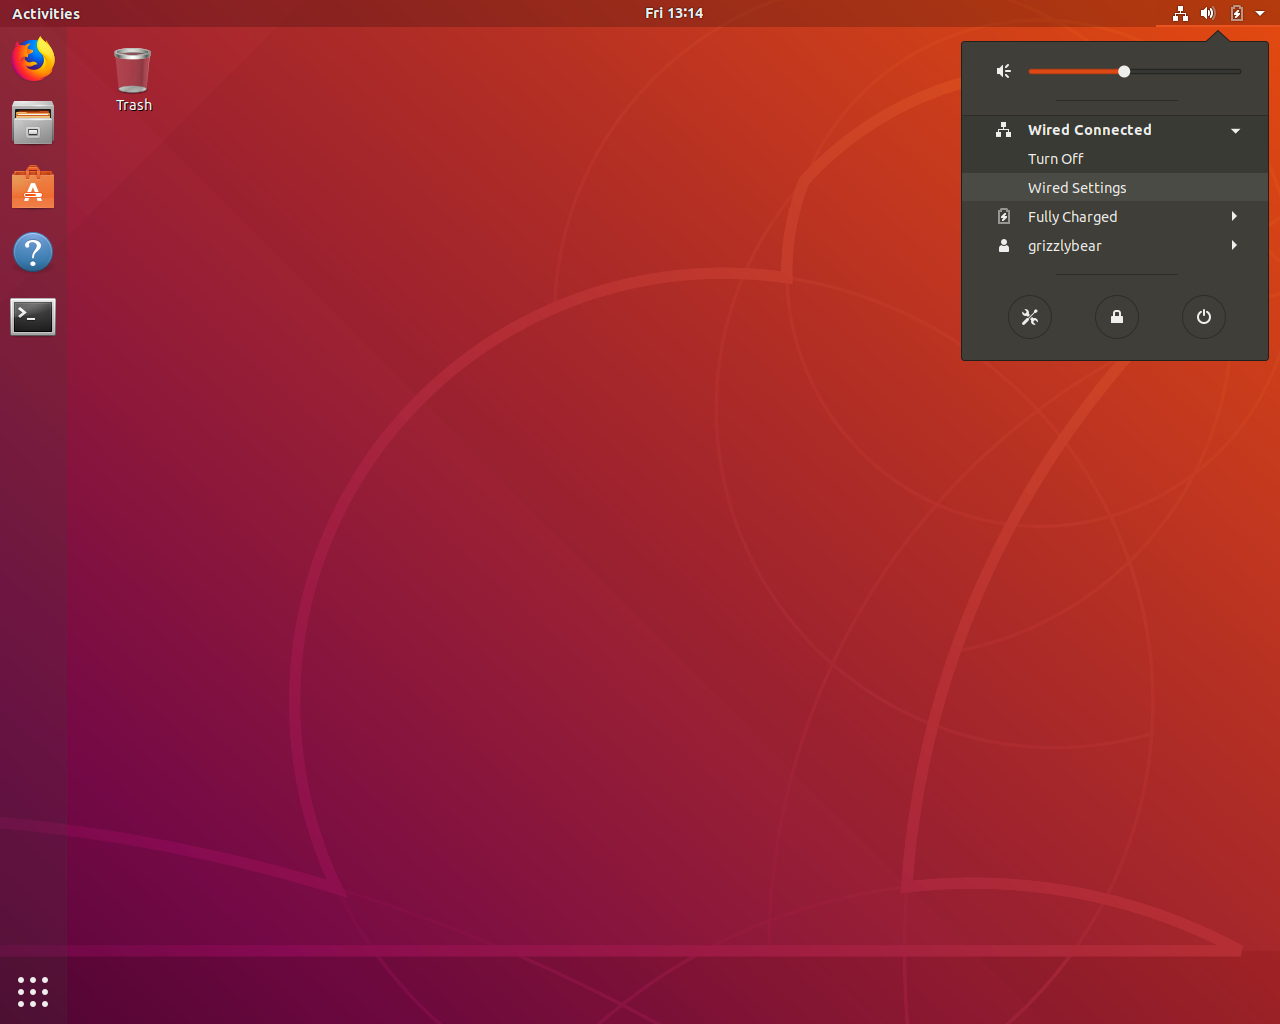
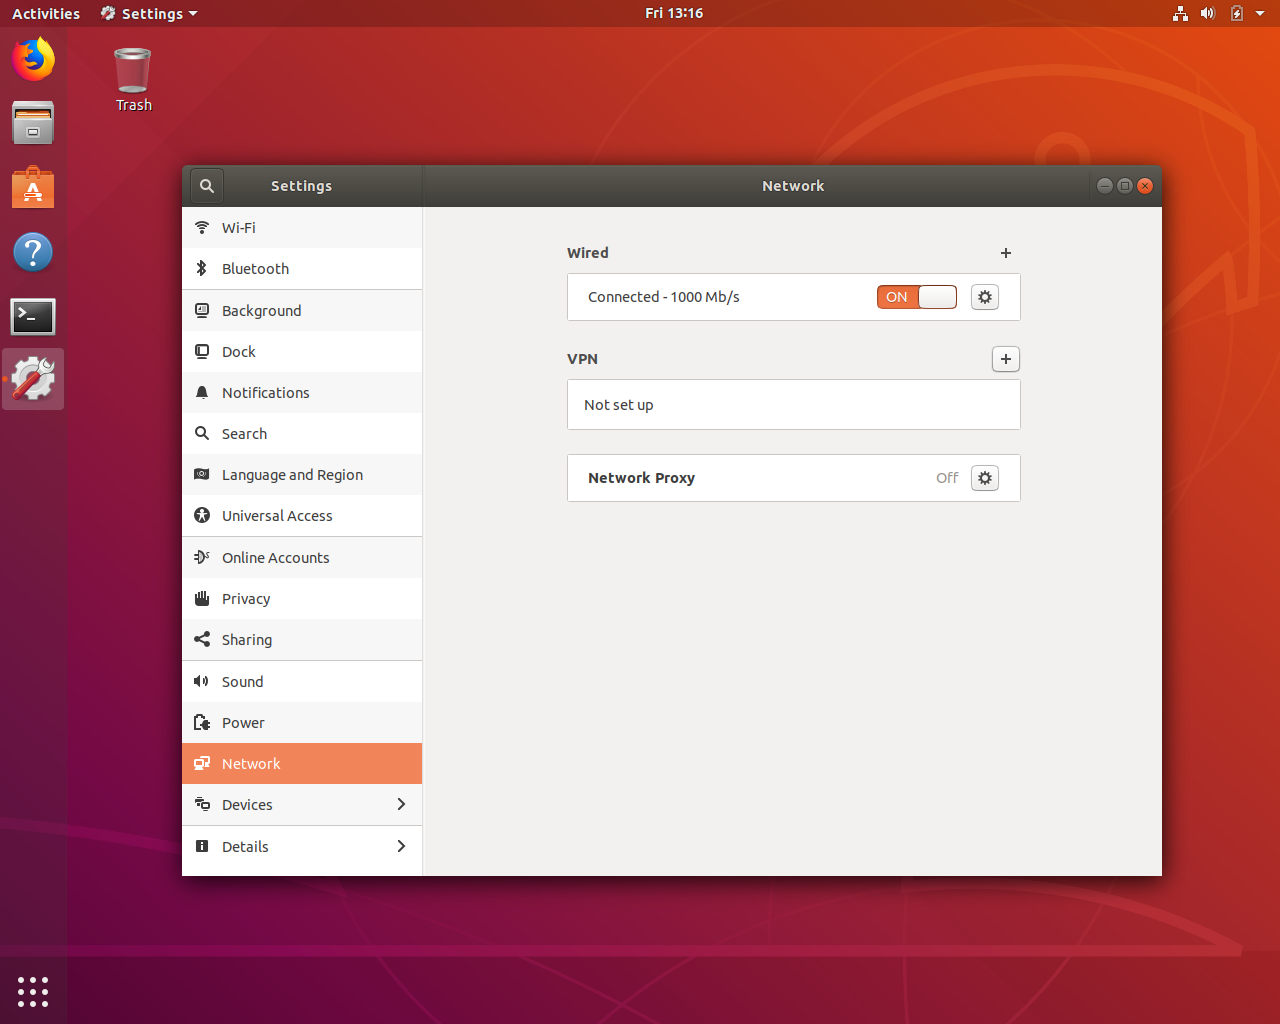
Open your network settings (usually by selecting the network button in your status bar)
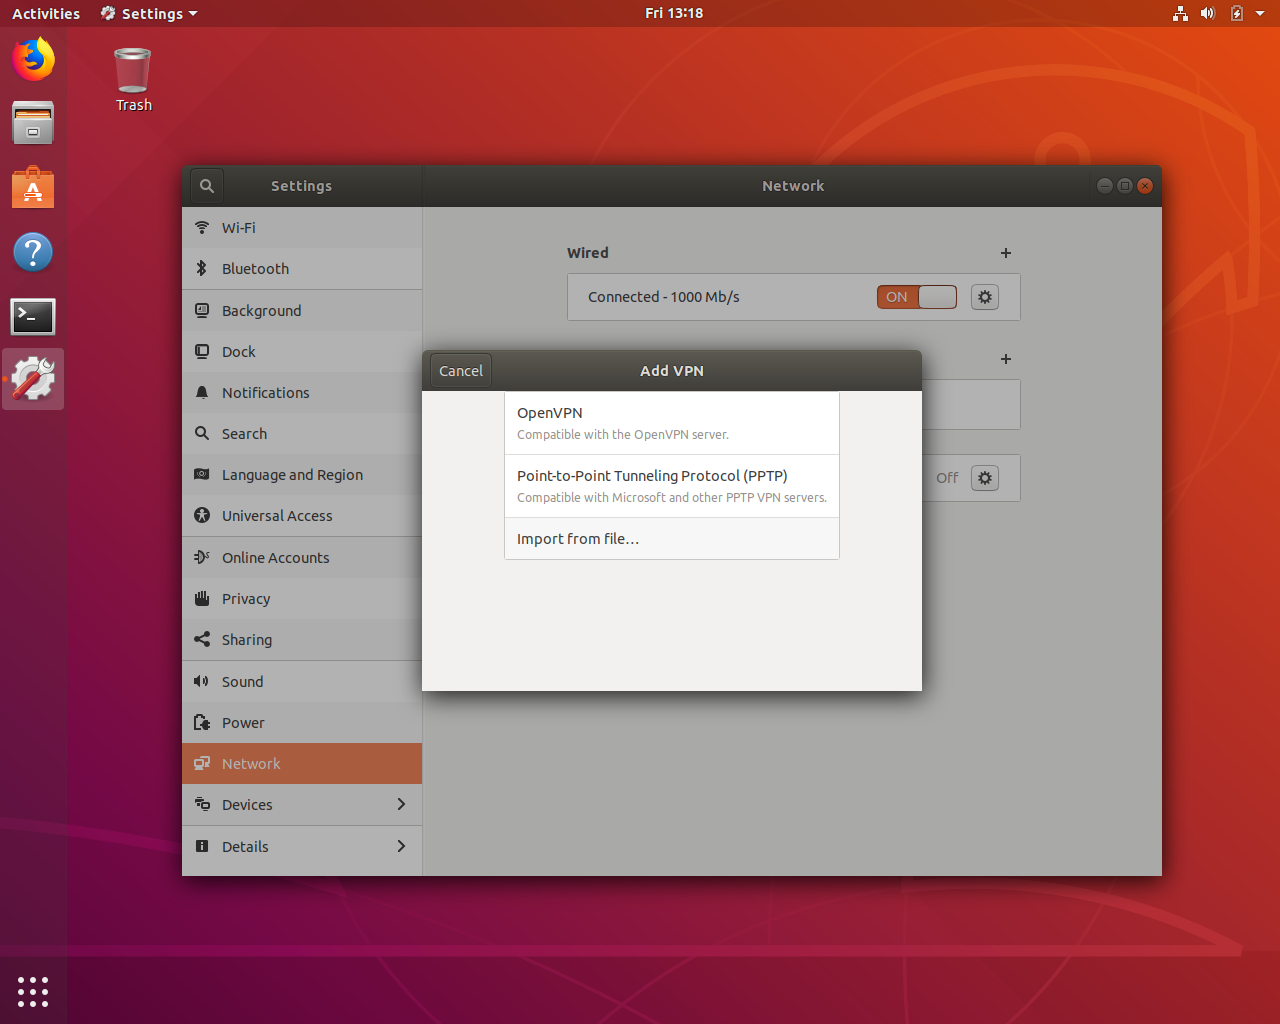
- Time to import the configuration files you downloaded earlier!
- On Ubuntu:
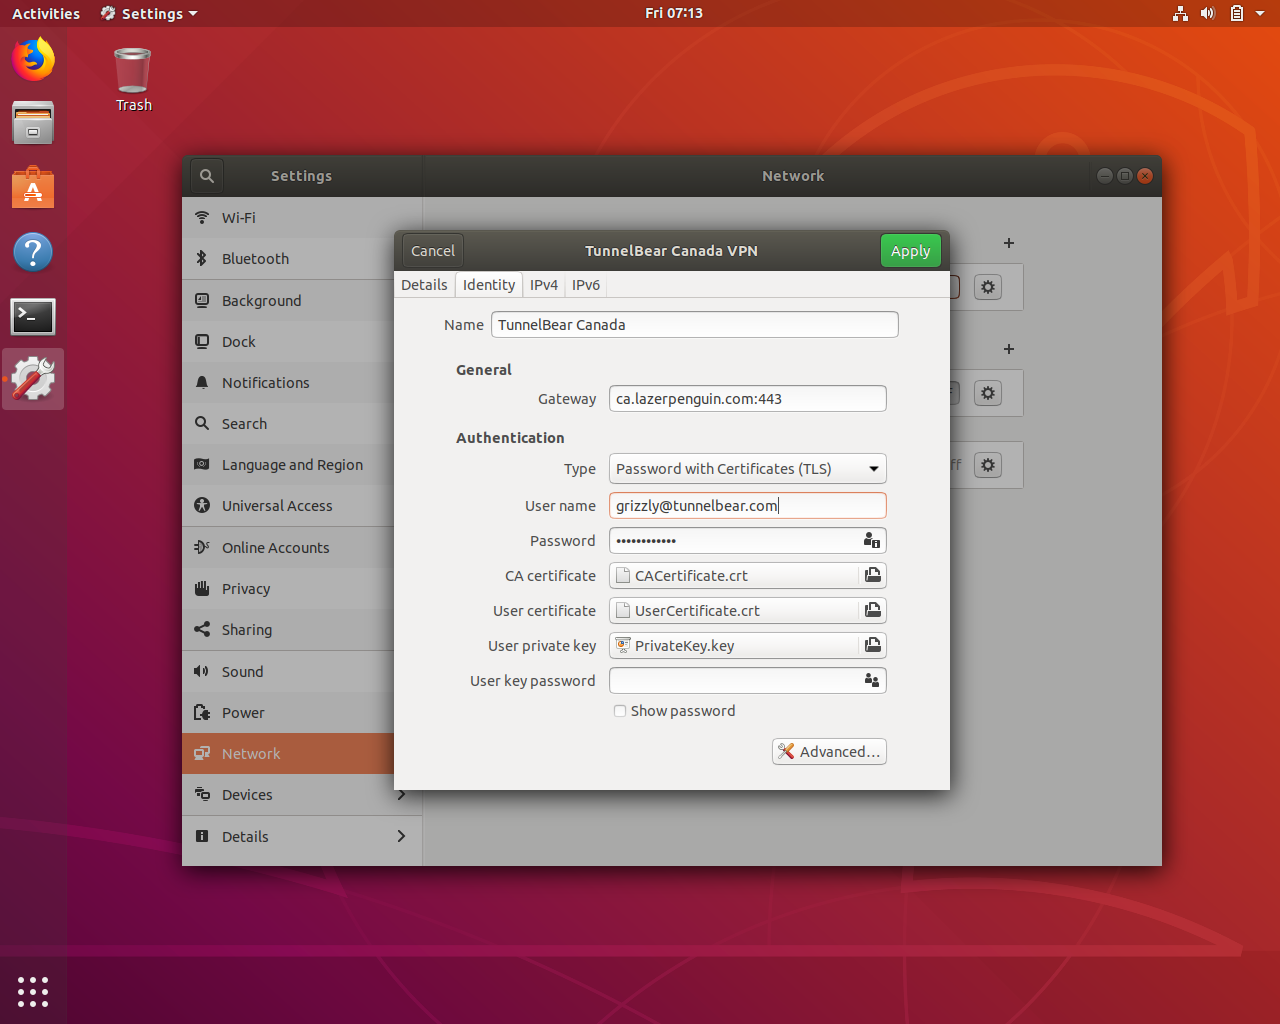
In the VPN section, click the "+" button to add a new VPN profile and select "import from file . . ."
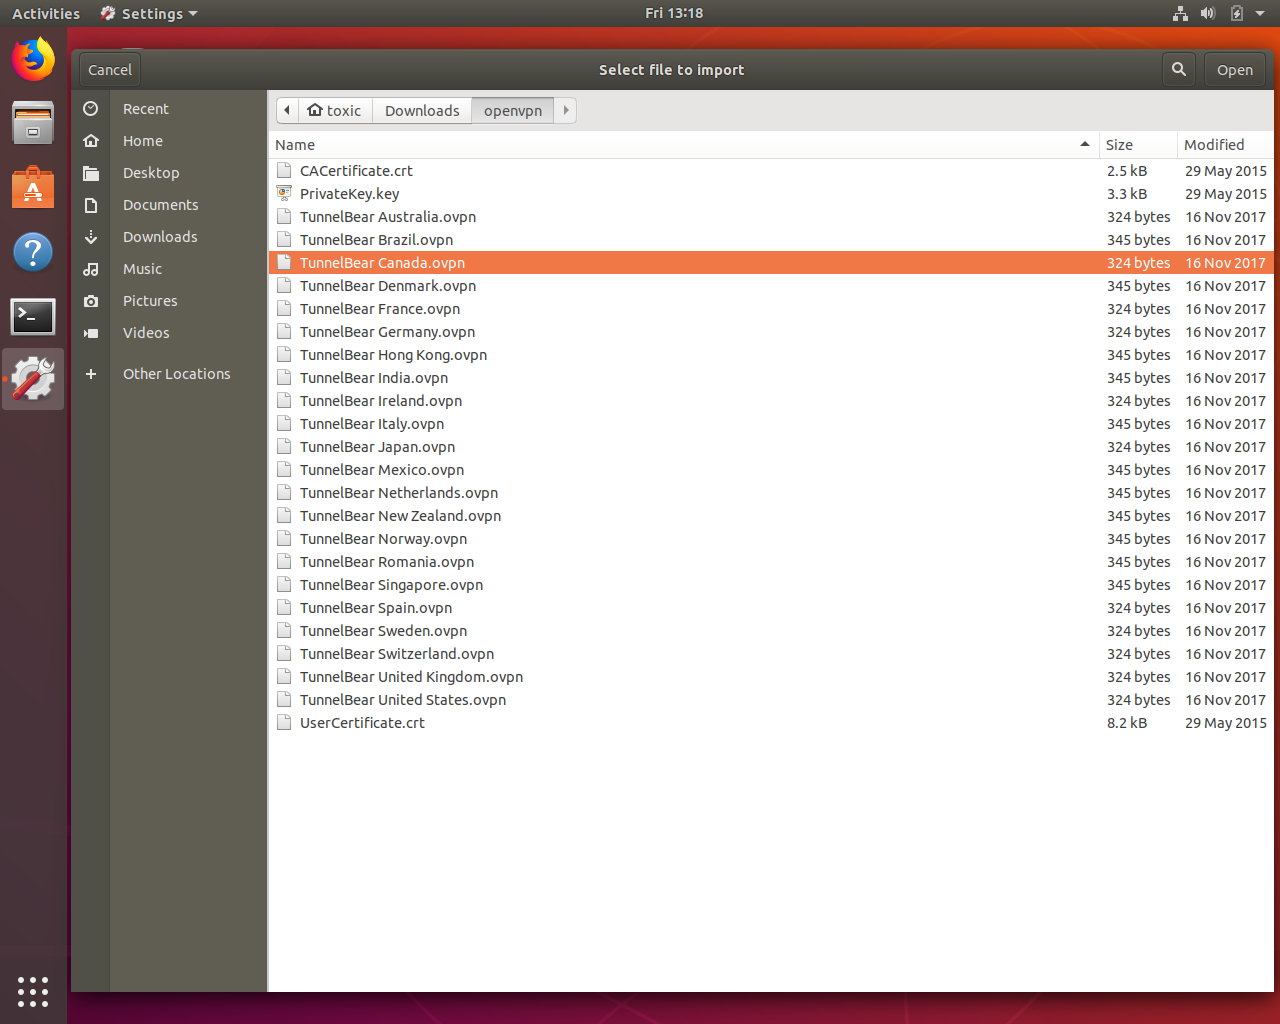
- Locate the unzipped folder from step 3. You’ll see a list of files, locate the file with the country name you’d like to connect to and select “Open”
- Most of the fields will now be auto-filled, but you’ll still need to enter your TunnelBear username and password:
-
For the username enter your TunnelBear account email address
-
For the password enter TunnelBear account password
Remember, you’ll need to have an active TunnelBear account before the Linux configuration will work!
-
Select the “Apply” button on Ubuntu. You’re almost ready to start tunnelling!
-
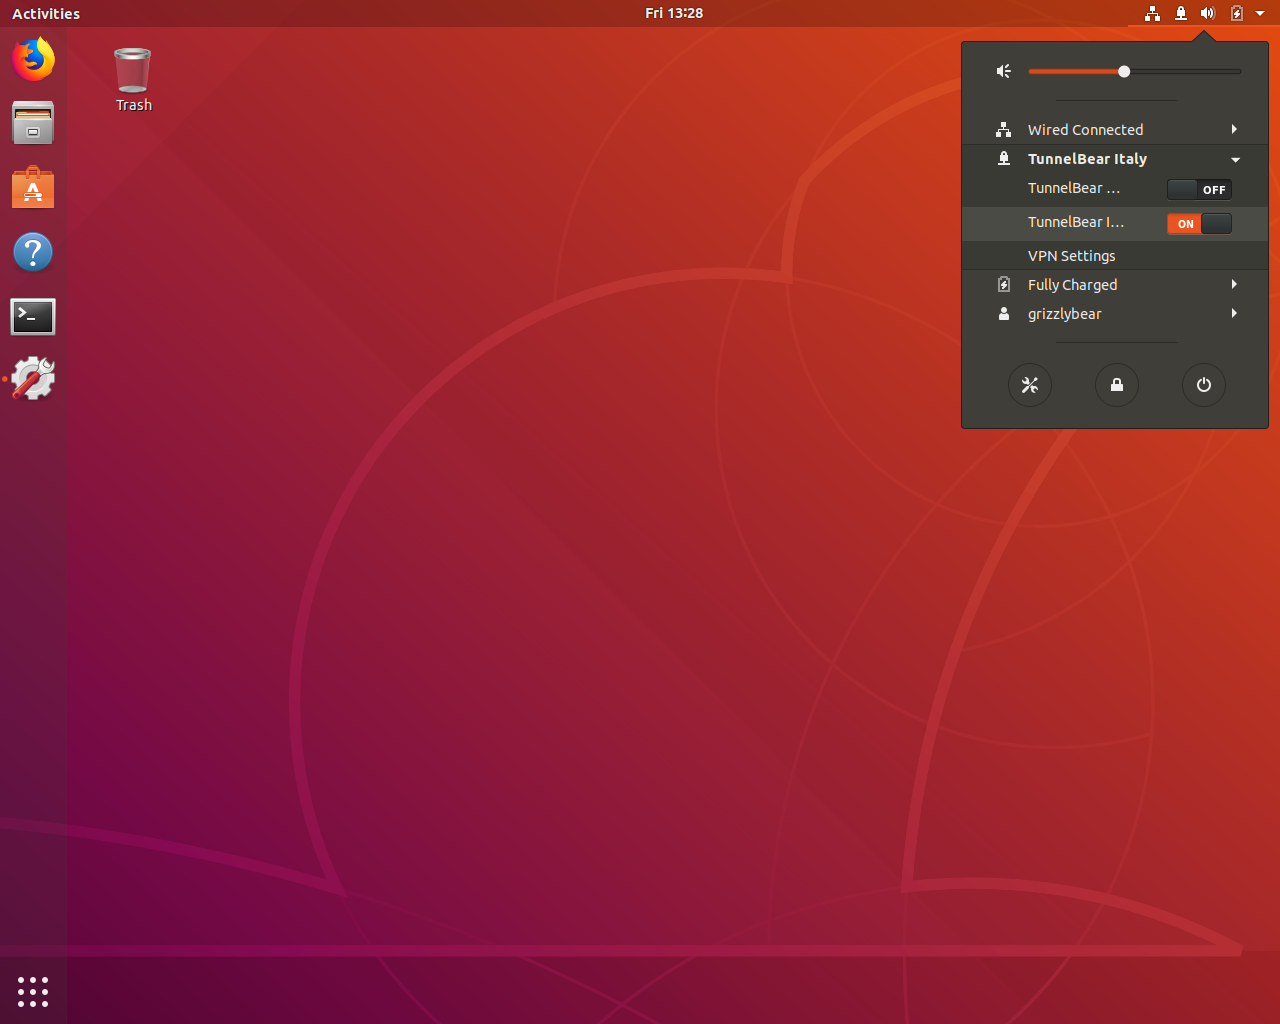
Select the network indicator in your status bar again...
- On Ubuntu:
You’ll see a sub menu for “VPN connections”. Under this sub menu, select the TunnelBear server you’d like to connect to from the list.
-
Once connected, a lock icon will appear over the network indicator in your status bar. This indicates that you’re connected securely to the VPN!
-
To confirm you're connected securely we can run a couple of tests...
-
Open your web browser and head over to this site to check your IP - the bear should be popping out of the same location you selected in step 6.
-
Make sure your DNS isn’t leaking by running the “Extended test”. The results should show the same IP address as reported when you checked the IP.
Summary:
-
TunnelBear for Linux can be setup using the steps above
-
The instructions above were written with Ubuntu in mind, but with some Linux-style ingenuity they should work with other distros too
-
Our ability to troubleshoot problems across every Linux distribution is limited
-
We’ll only be supporting OpenVPN, we’re not looking at other protocols at this time
-
Linux tunneling is only available for active TunnelBear accounts
Troubleshooting & Common Issues
"I'm having trouble connecting! (TLS handshake errors etc.)"
In an effort to further secure our server infrastructure we've recently pushed some updates to our servers that utilize stronger/newer OpenVPN ciphers. Make sure you’re using recent versions of the openvpn and openssl packages to prevent connection errors (especially if you’re using older distributions of Linux!). We recommend using the same (or later) versions of these packages as is included in the latest version of the Ubuntu’s LTS release. You can get the current versions with these links OpenVPN and OpenSSL
"I can connect but websites don’t load OR despite being connected my IP is still not changing!"
On some older distributions, NetworkManager does not pick up the DNS configuration that we are pushing from our VPN servers in order to prevent DNS leaks.
When establishing the VPN connection from the command line directly, there is no issue as DNS is configured outside of NetworkManager and via resolvconf (which edits the master DNS config file /etc/resolv.conf). Most default configurations of NetworkManager run their own DNS daemon (dnsmasq) for DNS caching. Unfortunately, when NetworkManager tries to apply the DNS configuration that we push down from the server, dnsmasq receives it, but does not apply this configuration globally.
You can workaround this issue with a quick edit of NetworkManager.conf.
-
From the terminal, enter the command (replace gedit with your text editor of choice)
sudo gedit /etc/NetworkManager/NetworkManager.conf -
Within the file, change the following line:
dns=dnsmasq
to this:
#dns=dnsmasq
- Lastly, in the terminal, enter the command:
sudo restart network-manager
This essentially stops NetworkManager from using the caching DNS server.